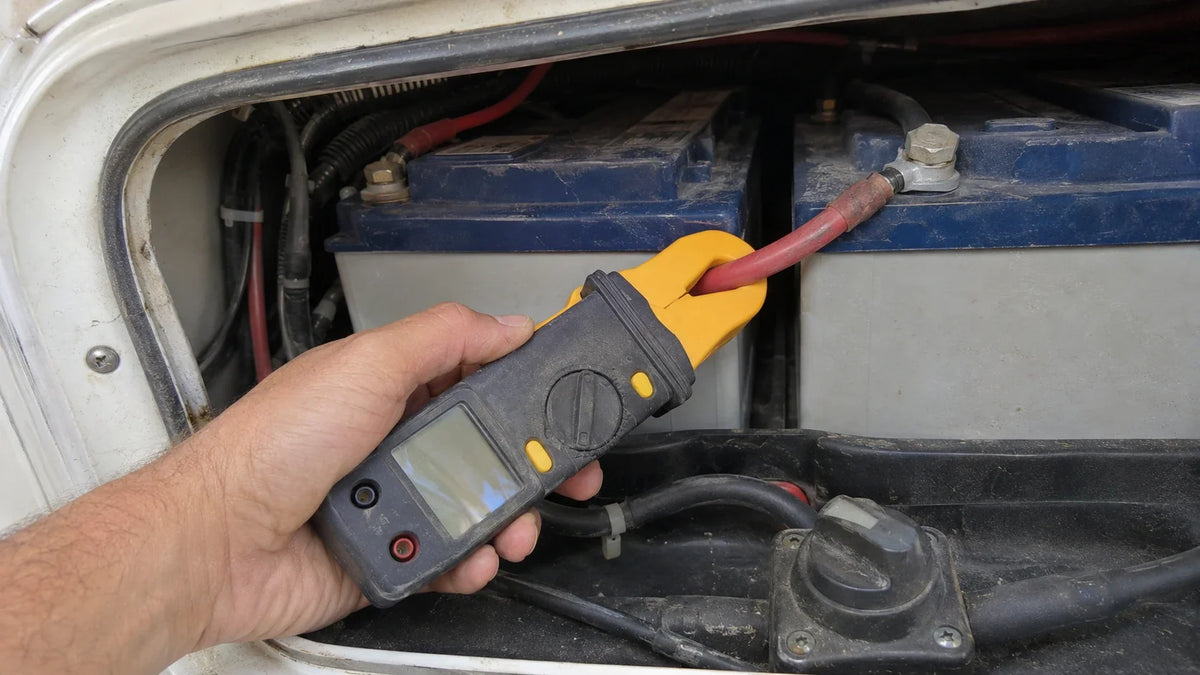

To measure DC battery current, use a clamp meter that explicitly supports DC current, choose a range that can show the expected current clearly, and clamp around one conductor carrying the current you want to measure. Follow that meter’s instructions for zeroing, jaw placement, and direction; record the reading with its sign and the battery’s operating state. The result describes current at that moment, not battery health.
Check the meter and range
An AC-only clamp meter cannot measure steady DC battery current. Check the meter’s functions for a DC-current mode, then compare its documented range and resolution with the current you expect to observe. The range must cover that current, and the display must be fine enough to distinguish a useful value. If the meter indicates overload, or the selected range gives a display too coarse to read meaningfully, do not estimate from it: select a suitable documented range or use a meter capable of the measurement.
Set up the clamp

- Identify one conductor. Choose the single cable carrying the battery current of interest. Clamping around both outgoing and returning conductors can make their magnetic fields cancel, leaving a reading that does not represent the current in either conductor alone.
- Select DC current and a suitable range. Use the meter’s documented auto-range or manual-range procedure, as applicable. The range should contain the anticipated current without sacrificing the resolution needed to read it.
- Zero the meter as instructed. Follow the model’s documented zero-adjustment procedure and any stated jaw conditions. Do not assume a universal button sequence. If the meter will not establish or hold a usable zero, the reading is not reliable; follow its instructions for correcting the setup before measuring.
- Position and close the jaws. Enclose only the selected conductor and make sure the jaws close as the meter requires. Follow any instructions about conductor position and the direction mark. In one documented instrument setup, the manufacturer’s DC-current instructions direct users to align the mark with current flow and place the conductor roughly at the center of the sensor; other meters may specify different controls and conventions.
Read and record the result
Read the display after the clamp is positioned, and record the value and units, the direction or sign shown, and what the battery was doing: supplying a load, being charged, or neither. A direction mark or conductor orientation can affect the sign, so interpret positive or negative according to that meter’s documented convention rather than assuming one convention applies to all meters.
Current changes when connected loads or charging change. Treat each measurement as a snapshot, and compare readings only when the operating conditions are known and meaningfully alike. A current value by itself does not establish battery health; it reports current flow under the conditions present when you measured it.
FAQs
Why should the clamp go around only one conductor?
Clamping around both outgoing and returning conductors can make their magnetic fields cancel, so the reading may not represent the current in either conductor alone.
What should I record along with a DC battery-current reading?
Record the value and units, the direction or sign shown, and whether the battery was supplying a load, charging, or neither. Current changes with operating conditions, so the reading is a snapshot rather than a battery-health diagnosis.
What if the clamp meter will not establish a usable zero?
Do not rely on that reading. Follow the meter model’s zero-adjustment and jaw-condition instructions, and correct the setup before measuring.