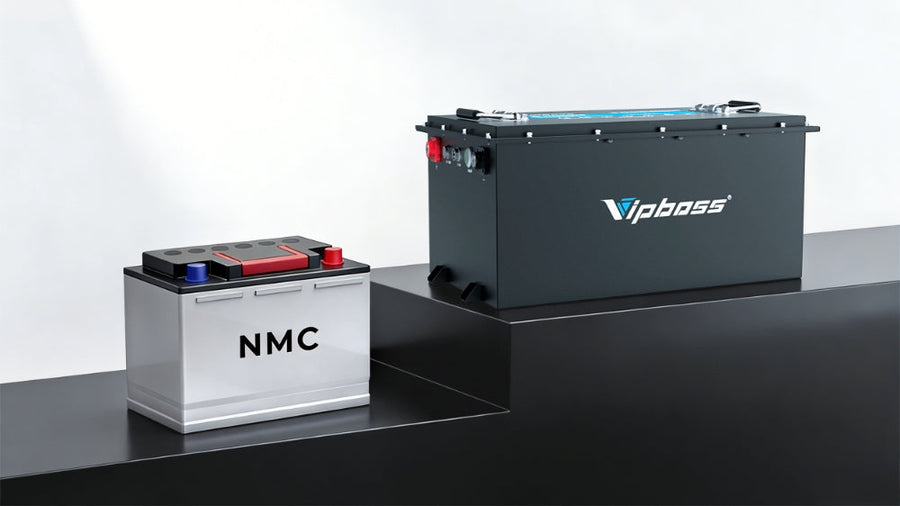
A 48V LiFePO4 battery trims weight, holds voltage under load, and recharges quickly compared with lead acid. This chemistry fits the stop-and-go rhythm of golf carts on courses, in neighborhoods, and around campuses. The walkthrough below covers selection, tools, safe power-down, mounting and wiring, 12-volt accessory power, first charge with on-board computer considerations, and a simple troubleshooting flow. Wear PPE, work methodically, and verify every connection before you energize the system.
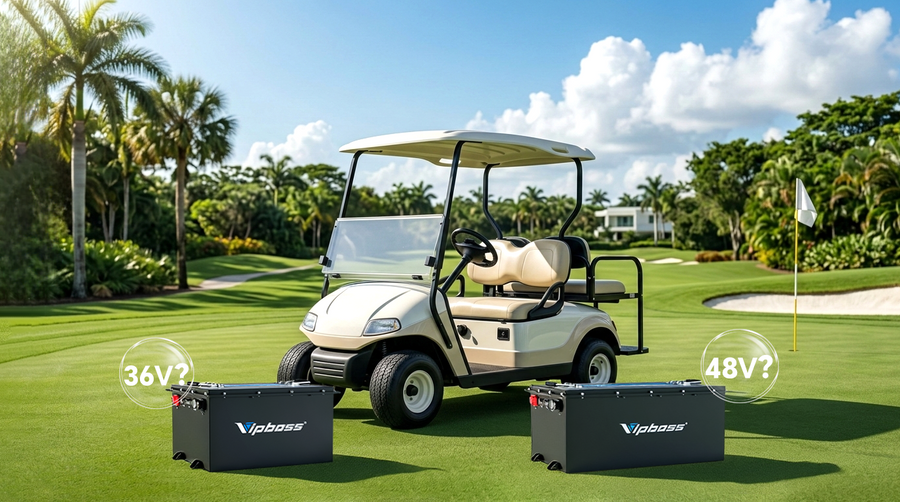
Step 1: Choose the Best 48V Lithium Battery for Golf Cart Use
Your route and payload set the capacity. On flat paths with one rider, a mid-size pack usually covers daily use; hills, passengers, or frequent hauling call for extra headroom. A modern 48-volt cart pack is typically a sixteen-series LiFePO4 arrangement with a nominal 51.2 volts and a full-charge target near 58.4 volts.
For the battery management system, look for a continuous rating that comfortably matches the controller's demand and a short surge rating that handles launch and climbs. Fit also matters: check tray dimensions, hold-down clearance, and cable bend radius before you buy. While researching, queries like best 48V lithium battery for golf cart help surface packs with the right footprint and current capability.
Step 2: Gather Tools, Parts, and Safety Gear
Preparation does half the work. Before lifting the seat, write a quick parts list, print torque specs, and stage tools in the order you'll use them. A tidy bench and labeled bags prevent small mistakes that become big headaches. Working from a checklist keeps the job calm and predictable.
Safety and tools
- Insulated gloves and eye protection
- Torque wrench with the correct sockets and bits
- Quality lug crimper, heat gun, multimeter
- Zip ties, cable clamps, protective loom
Electrical and consumables
- Correct-gauge battery cable and tinned copper lugs
- Heat-shrink tubing and wire labels
- Main fuse and holder matched to system current
- Degreaser and contact cleaner
Key components
- Charger with a 48-volt LiFePO4 profile
- 48-to-12-volt DC-DC converter sized for all accessories
- SOC display or monitor for live readings if you prefer
Select the cable gauge and the main fuse value from the controller current and the total cable length. Place the main fuse on the positive lead as close to the battery as practical to minimize unprotected conductor length. Keep torque specs handy and follow them.

Step 3: Power Down and Remove the Old Pack Safely
With the cart parked and secure, the Tow/Run switch goes to Tow, the key comes out, and the brake is set. Photos of each connection protect you from mix-ups later, and small accessory leads get labels before anything moves. The negative cable comes off first, then the positive. After the pack is out, clean the tray and feel for sharp edges that could chafe new wiring; add abrasion guards where needed. If the cart carried a 12-volt feed, note the path now. The incoming LiFePO4 lithium battery will rely on a DC-DC converter rather than tapping cells.
Step 4: Mount and Wire the Main Pack
Once the new pack sits in the tray, make it immovable with a clamp, strap, or formed hold-down. Foam or rubber where the case meets metal reduces scuffing. Terminal orientation that shortens runs and avoids tight bends pays off in lower resistance and easier service.
Main circuit sequence
- Battery positive to the main fuse
- From the fuse to the contactor and controller positive
- Battery negative to the controller negative or a dedicated negative bus
Crimp lugs fully, shrink every termination, and support cables near bends with clamps or loom. Keep the routing tidy, protected from heat and moving parts, and do not use the frame as a return. Measure pack voltage after the last crimp; around 51 volts at rest is typical. Torque each fastener to spec and mark with a paint pen so any movement shows later. If the controller lacks a precharge path, add an anti-spark connector or a resistor-based precharge step so input capacitors do not see an inrush spike when you first connect the LiFePO4 battery.
Step 5: Feed All 12-Volt Accessories With a DC-DC Converter
Every accessory deserves a clean 12-volt rail. A single-battery tap unbalances a pack, so the reliable answer is a DC-DC converter. Size it to at least one and a quarter times your combined accessory draw. Tie the enable lead to switched power so the converter wakes with the key and sleeps when parked. A shared negative bus keeps diagnostics simple, and a protected mounting panel with modest airflow helps the unit run cool alongside your LiFePO4 battery.
Step 6: First Power-Up, Charging, and OBC Considerations
Before energizing the cart, run a seven-point preflight:
- Polarity correct on every terminal
- All connections torqued and paint-marked
- Main fuse value and orientation verified
- Cable supports and clamps tightly, no pinch points
- Tow/Run returned to Run
- Low-voltage circuits tidy and labeled
- Contactor or precharge method confirmed
Some Club Car models use an on-board computer to manage the original charger. When switching to an external LiFePO4 charger, follow the service procedure or use a proper bypass kit so the new charger connects correctly.
Set the charger to a LiFePO4 profile. Many builders choose a termination between 56.8 and 58.4 volts for a 48-volt pack. The lower end favors longevity, while the upper end helps cell balancing complete. If the charger supports a gentle start, begin at reduced current and watch for warmth or noise. After the first full charge, calibrate the SOC display to match real capacity. Take a short, controlled drive, then check the temperature of the lugs, the fuse, and the contactor. Any hot spot calls for an immediate retorque and inspection. A 48-volt LiFePO4 battery that clears this sequence is ready for regular use.
Troubleshooting and Pro Tips
A smart order speeds diagnosis. Mechanical and wiring checks come first, then low-voltage logic, then the high-voltage path, then BMS status, then charger settings.
- Cart does not move. Confirm Tow/Run, listen for a contactor click, verify key power at the controller, and check throttle signal connections.
- Low-voltage alarm or blown main fuse. Measure the pack voltage at rest and under light load. Revisit fuse sizing and cable gauge if voltage sags or components warm up. Inspect for a loose or pinched cable.
- Cannot reach full charge or the SOC looks wrong. Confirm the charger's termination sits in the 56.8 to 58.4 volt window. Run one full gentle charge and recalibrate the SOC display. Look for a parasitic draw that remains live when parked.
- Range varies day to day. Check tire pressure, brake drag, and accessory loads. Re-inspect routing for rub marks and retorque major lugs.
Daily habits keep performance steady. Keep most cycling in the middle of the SOC window, avoid long periods parked at full charge, and limit charging in very cold conditions until the pack is warm. For seasonal storage, land between 30 and 60 percent with periodic top-ups. A short inspection every one to three months catches loose hardware early. Consistent habits help the best lithium golf cart battery deliver repeatable results over many seasons.

Complete the Upgrade and Start Driving
You now have a clear path from selection to first charge. Size capacity and BMS to the controller, build a short-protected main circuit with the fuse near the positive post, power every 12-volt load through a DC-DC, and set a LiFePO4 profile between 56.8 and 58.4 volts. If your cart includes an on-board computer, complete the bypass before charging. Print the preflight and torque checklist, tape it under the seat, and schedule the upgrade for your next free afternoon. Once the LiFePO4 battery passes the test drive and the post-ride touch check, enjoy a quieter, steadier Club Car with charging that fits your routine.
FAQs about LiFePO4 Installation
Q1. Will regenerative braking harm a LiFePO4 pack in a golf cart?
It won't if the controller's regen charge current stays below the BMS limit. Cap regen current, taper it at a high state of charge, and disable regen at a full pack to avoid overvoltage spikes. Some BMS offer over-voltage bleed; confirm compatibility.
Q2. How can I get accurate state-of-charge readings after the swap?
Use a shunt-based coulomb counter, run one full calibration cycle, then enable temperature compensation. Set tail-current thresholds to detect "full," and schedule periodic zero-drift corrections. Display smoothing avoids jumpy readings while preserving response to real load and terrain changes.
Q3. Can I charge the pack from solar while driving or parked?
Yes, with an MPPT set to an LFP profile feeding the 48-volt bus. Fuse the PV and battery leads, add a blocking device per controller guidance, and size charge current within BMS limits. Keep 12-volt loads on the DC-DC, not the solar controller.
Q4. What's the right strategy for cold-weather operation and charging?
Plan for preheating below freezing. Self-heating LiFePO4 packs or pad warmers bring cells to a safe charge temperature. Limit regen at sub-zero conditions, and allow the BMS to reduce charge current until cell temperature rises into the manufacturer's recommended window.
Q5. Do I need any compliance or documentation for insurance and service?
Keep a wiring diagram, fuse values, torque records, and pack labels accessible. Choose batteries tested to UN 38.3 and relevant safety standards such as UL 2271 or IEC 62133 where applicable. Document changes for campus or HOA rules and emergency responders.