


This guide explains how to diagnose, clean, protect, and design coastal battery systems so their terminals stay corrosion-free for at least a full season, and often for years.
Coastal batteries can stay clean year after year when you control salt spray, neutralize deposits correctly, and seal every terminal with the right protection, hardware, and charging habits.
Pop open a battery box in a beach-town driveway or on a moored sailboat after one salty season and you might see white fuzz, crumbly clamps, and a system that struggles to crank or keep the lights on. Owners who switch to a simple clean-tighten-protect routine often open that same box a year later to bright metal and instant starts. This guide explains why salt spray attacks so quickly and how to build a one-year corrosion shield around your terminals, whether they feed a trolling motor, a lithium house bank, or a whole off-grid cabin.
Why Salt Spray Destroys Battery Terminals So Quickly
Saltwater exposure drives aggressive corrosion on metal contacts and housings in boat and dockside electrical systems, causing flaky terminals, erratic electronics, and early failures, as shown in marine corrosion guidance for boat electronics in saltwater corrosion protection. Salt-laden mist carries microscopic droplets that settle on battery posts, lugs, and bus bars; moisture and oxygen mix with salts and battery gases to create a conductive film that slowly eats metal and builds resistance.
In salty air, chloride ions attack the thin oxide films that normally protect metals, setting up thousands of tiny galvanic cells on each terminal surface. Dissimilar metals, such as a brass clamp on a lead post or a stainless bolt through an aluminum bracket, accelerate this galvanic effect, which is why mixed-metal hardware in marine solar and battery structures fails much faster than identical metals in the same conditions. Even several miles inland, wind-blown salt can cling to housings and cable glands, so coastal residents with roof-mounted solar or driveway battery banks face many of the same chemistry problems as boaters.
To understand how harsh that environment really is, labs use neutral salt spray cabinets for lithium and electric-vehicle pack components, soaking connectors, bus bars, and coated enclosures in a 5% salt fog at about 95°F for hundreds of hours to mimic years of coastal exposure, as described for battery materials in salt spray corrosion testing. Those tests focus heavily on enclosures and electrical terminals because corrosion there raises contact resistance, wastes power as heat, and can even create shorts. Your dock box or wall-mounted battery rack may not sit in a test chamber, but sea breeze, road spray, and humid nights can leave it in a similar low-grade fog all year.

Diagnose Your Corrosion Problem Before You Treat It
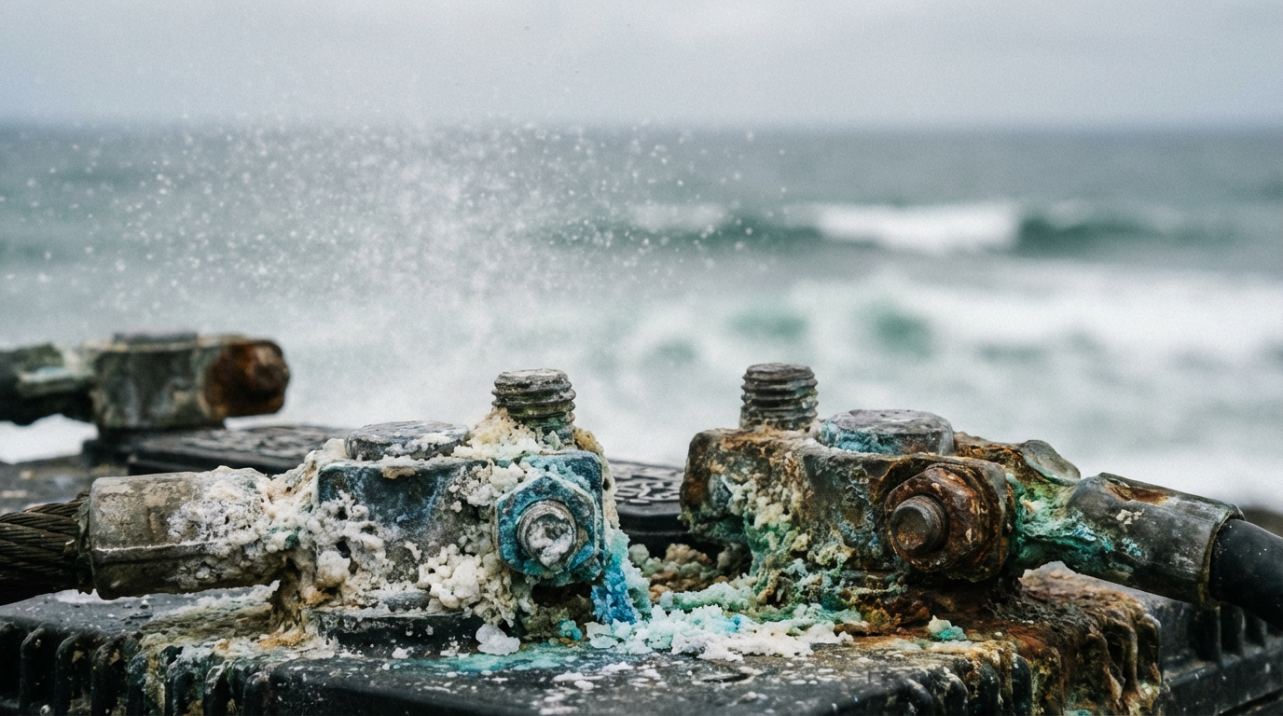
Battery terminal corrosion typically shows up as white, blue, or greenish powder and sometimes a wet, sweaty look around posts and cable ends. This buildup restricts current flow and shortens battery life, as described in automotive guidance on battery terminal corrosion. The same symptoms appear on marine batteries and off-grid banks: starting becomes sluggish, inverters drop out under load, and lights dim when large loads like windlasses or fridges come on.
The powdery crust forms when hydrogen gas released from the electrolyte reacts with air, moisture, and any salt present. The reaction is pushed along by heat, overcharging, or overfilled flooded cells that let electrolyte creep toward the posts, patterns that match automotive repair experience with car battery terminal corrosion. If the battery is physically cracked or leaking, that escaping electrolyte usually makes one area much worse than others, and the safest choice is replacement rather than repeated cleaning.
Where the corrosion concentrates also tells a story. Heavy buildup focused on the positive terminal can point toward an overcharging problem, while corrosion mainly on the negative terminal often suggests chronic undercharging and short run times; both patterns are flagged in professional guidance on battery corrosion and charging issues. In a coastal setting, this might look like a solar-charged beach RV whose controller is set too high for its flooded batteries, or a small fishing boat that makes only short runs and never lets the alternator fully recharge the starting battery.
A quick mental check helps: if one battery in a multi-battery bank on your dockside solar system is furred up while its neighbors are relatively clean, suspect a wiring, charging, or airflow problem with that unit rather than blaming "coastal air" alone. Fixing the root cause while you clean dramatically improves the odds that your next season starts with clean terminals instead of a fresh layer of crust.

A One-Year, Salt-Resistant Maintenance Routine
Across marine, automotive, and off-grid setups, a clear pattern emerges: you stay ahead of corrosion by periodically cleaning deposits, neutralizing leftover acid, and sealing metal surfaces so salt and gas cannot reach them. Think of it as a short but disciplined ritual rather than a crisis job done only when the boat will not start.
Step 1: Clean Safely and Neutralize Existing Corrosion
Begin with safety: those white and blue deposits are caustic and can irritate skin and eyes, so heavy gloves and eye protection are essential. Vehicle-focused guides on cleaning battery corrosion also stress working in a well-ventilated space. Disconnect the battery by removing the negative terminal first, then the positive, to avoid shorting tools against grounded metal. If possible, lift the battery into a shallow pan so debris and rinse water are contained instead of falling into a bilge or onto painted concrete.
Knock loose crusty deposits with a wire brush, then neutralize remaining acidic residue with a paste or solution of baking soda and water applied by rag or brush rather than poured over the case, a detail repeated in step-by-step instructions for cleaning battery corrosion. Once the fizzing stops, rinse carefully with clean water, keeping liquid away from vent caps or seams. Finish by drying posts, lugs, and the battery top thoroughly with a clean cloth; any trapped moisture is fuel for the next round of corrosion.
While everything is disconnected, inspect cable ends for hidden damage. Cracked insulation, green creep under the jacket, or badly pitted lugs are signs that the cable should be replaced instead of reused, because corrosion inside a crimp can create resistance and heat even if the visible terminal looks acceptable. This is also the moment to improve routing so cables do not lie in puddles or drip paths where saltwater can soak them repeatedly.
Step 2: Tighten and Rebuild a Low-Resistance Connection
Once posts and lugs are clean and dry, rebuild the connection so it is mechanically solid and electrically efficient. Reinstall the battery firmly in its tray or box to limit vibration, then slide clean lugs fully down onto posts or studs so there is maximum metal contact, following the reconnection order in battery reinstallation steps. Tighten clamps until you cannot twist them by hand; loose connections flex under load, generating micro-arcs that throw off more corrosive byproducts and can overheat.
Corrosion does not just look ugly; it increases resistance at the terminal, wasting energy as heat and reducing the battery's ability to deliver power to starters, inverters, or DC loads, a point emphasized in discussions of how battery corrosion impacts performance. A well-tightened, fully seated clamp gives you a low-resistance, high-contact area that stays cooler under heavy current draws, from anchor windlasses to big inverters.
On marine batteries in particular, tight, secure connections are highlighted as a key part of corrosion control, since movement and poor contact both accelerate buildup, as described in marine battery corrosion prevention guidance. After tightening, recheck that no cable or lug can move if you tug it firmly. If it does, correct that before moving on to protective coatings.
Step 3: Seal the Metal With the Right Protection
With bare metal rebuilt, the final step is to keep salt, moisture, and gases away from it. Automotive and marine guides alike recommend wiping a thin film of dielectric grease or applying a purpose-made terminal protector spray over the cleaned terminals to create a barrier that slows future buildup, an approach reinforced in battery terminal corrosion tips and in the description of battery terminal corrosion. Fiber anti-corrosion pads under the clamps plus grease or spray on top are especially helpful in salt-heavy environments.
Many coastal owners worry that dielectric or petroleum-based greases will "insulate" the terminal and hurt conductivity, but experienced marine and workshop users report that, when clamps are properly tightened, the grease is squeezed out of the actual contact faces while remaining in the gaps to block air and moisture, as described in a long-running discussion of battery terminal corrosion protection. The result is slightly less-than-perfect initial contact that stays stable and low-resistance over time instead of a pristine bare joint that quickly corrodes.
For especially harsh salt spray environments, such as exposed terminals near an anchor locker or vehicle packs that face winter road salt, specialty connector lubricants that have passed extended salt spray and cyclic corrosion tests can add an extra safety margin. In one case study, a spray-resistant grease identified as NyoGel 760G met a customer's corrosion and water-spray requirements in 30-day tests on both nickel brass and tin copper terminals, demonstrating durability in aggressive lab conditions representative of coastal service, as summarized in spray resistant grease for battery terminals.
The main protection options and trade-offs look like this:
Protection option |
Works best for |
Main advantages |
Limitations in coastal use |
Thin petroleum jelly or general grease |
Budget setups and lightly exposed systems |
Cheap, widely available, proven in workshop and boating practice |
Can be messy; needs periodic reapplication when it attracts dirt |
Dielectric grease |
Vehicles, boats, and solar connectors |
Seals out moisture while preserving clamped metal contact |
Non-conductive, so must be used sparingly on contact surfaces |
Dedicated battery terminal spray |
Multi-battery banks and tight spaces |
Dries to a thin, visible coating; easy to reapply during inspections |
Thick coats can be hard to remove for later service |
Specialty salt-spray-rated grease |
Harsh marine or de-icing environments |
Tested for long-term salt and water-spray resistance |
Higher cost; best for critical or hard-to-access joints |
Apply whichever option you choose sparingly on already tightened connections, focusing on exposed metal surfaces, cable entries, and the junction between post and clamp rather than filling the clamp itself.

Design and Retrofit Choices That Keep Terminals Clean for the Long Haul
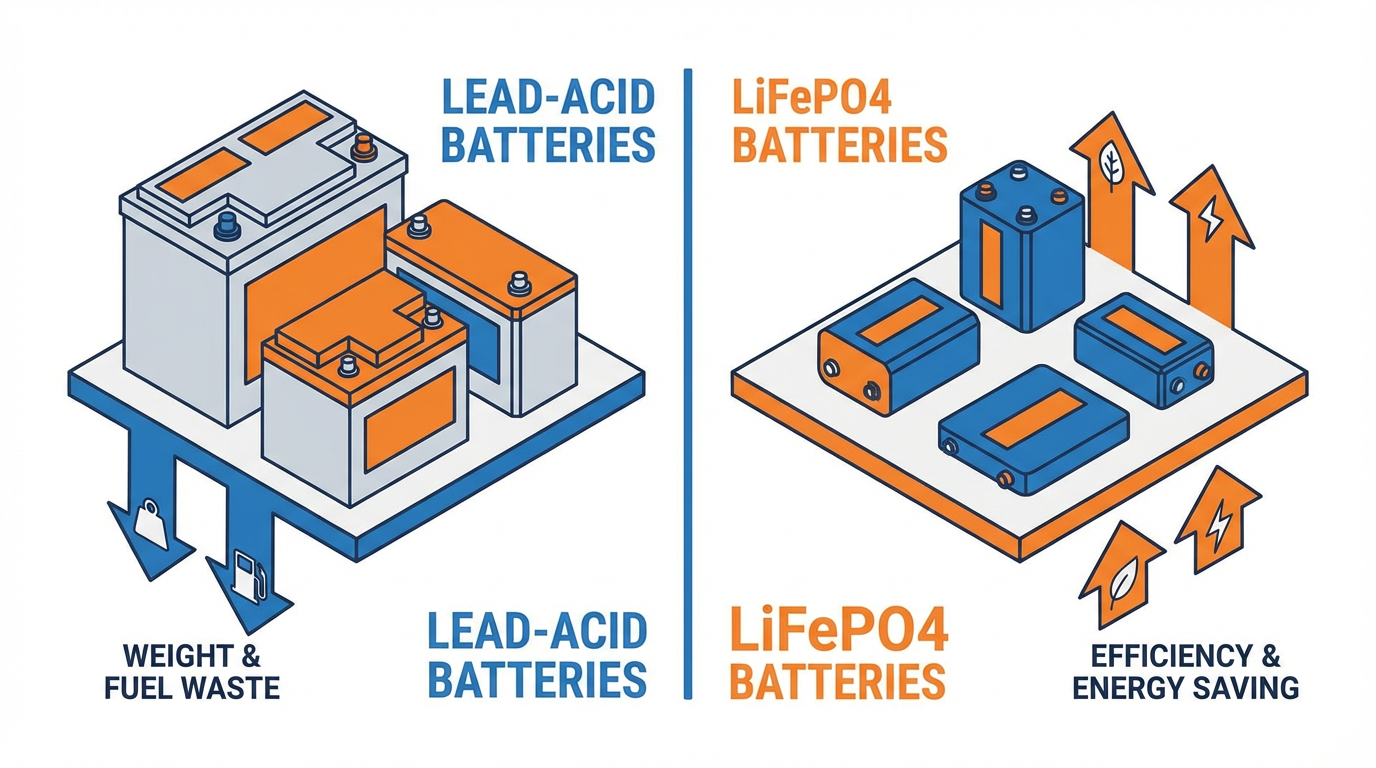
Beyond routine maintenance, smart hardware choices make a big difference in how fast terminals corrode in salty air. Modern lithium iron phosphate packs designed for marine and off-grid use combine rugged cases, internal battery management systems, and stable LiFePO4 chemistry to handle vibration and deep cycling better than conventional flooded lead-acid batteries, as outlined in LiFePO4 marine battery practices. These packs release far less gas and acid mist, which lowers the chemical fuel that feeds terminal corrosion.
However, even sealed lithium cells do not eliminate corrosion risk, because the weak points in harsh environments are often the external connectors, bus bars, and enclosures. Salt spray testing protocols expose aluminum, stainless steel, and coated steel housings, as well as copper and plated terminals, to continuous salt fog specifically to see whether corrosion will raise contact resistance or cause failures in energy storage and electric-vehicle packs, as described in salt spray corrosion testing. When you choose hardware for a coastal retrofit, it pays to favor components whose manufacturers clearly advertise corrosion-resistant materials and robust environmental sealing.
In practice, that means preferring tinned copper wiring, high-quality copper or plated lugs, and stainless or properly coated hardware, along with sealed connectors and heat-shrink over all splices, approaches that mirror best practices for keeping boat electronics alive in saltwater in marine corrosion protection guidance. Avoid mixing dissimilar metals directly in contact where they will be damp; for example, do not clamp a bare aluminum lug under a stainless nut on a steel stud without a compatible washer or coating, because the less noble metal will sacrifice itself first in salty moisture.
Finally, treat your battery compartment like a critical piece of electronics, not just a storage bin. Keeping batteries in cool, dry, ventilated spaces out of direct spray and standing water dramatically slows corrosion, with marine guidance recommending clean, dry cases and regular inspections every few months, as described in marine battery corrosion prevention. Drip loops in cables, sealed deck glands, and covered junction boxes all reduce the chance that saltwater will run directly onto terminals in the first place.
Charging and Storage Habits That Slow Corrosion
How you charge and store batteries matters almost as much as what you bolt to the posts. Overcharging flooded lead-acid batteries drives up internal temperature, boils electrolyte, and releases more hydrogen gas, which then reacts at the terminals and accelerates corrosive buildup, a pattern identified in discussions of car battery terminal corrosion and in broader descriptions of battery corrosion causes. Undercharging is not harmless either; repeatedly leaving batteries partially charged encourages sulfate buildup inside and often shows up as corrosion on the negative post.
Using a charger matched to your battery chemistry and size, and avoiding chronic "just leave it on max" habits, is central to controlling corrosion. Marine guidance emphasizes avoiding overcharging by choosing chargers that follow manufacturer voltage recommendations and maintaining a healthy state of charge, as outlined in marine battery charging practices. For LiFePO4 banks, choosing a charger and system design that respects the pack's voltage limits and low-temperature charging cutoff keeps the pack safe and helps the internal management system prevent damage, aligning with the installation and charging advice for LiFePO4 marine battery systems.
Storage conditions strongly affect how fast terminals corrode between seasons. Marine and automotive battery guidance recommend cool, dry, well-ventilated storage away from saltwater, freezing temperatures, and excess humidity, with inspections every few months to remove dirt and early corrosion from terminals and cases, as described in marine battery corrosion prevention. Lithium packs benefit from being fully charged before storage, disconnected from parasitic loads, and kept in a cool, dry location, with some LiFePO4 units specified to be removed if ambient temperatures may fall below about -15°F and protected by internal controls from charging below roughly 24°F, details highlighted in LiFePO4 marine battery practices.
Keeping the battery top clean and dry after charging or topping up, wiping away any acid mist or salt deposits before they dry, and reapplying a thin layer of terminal protection when needed are all small habits that add up to big gains in corrosion control. Taken together, thoughtful charging profiles and smart storage turn your terminals from a chemical battleground into a stable, predictable connection.
Example: Turning a "One-Season" Coastal Battery Into a Multi-Year Workhorse
Imagine a small coastal fishing boat with a pair of flooded starting batteries tucked into a stern locker that gets hit with spray on every choppy run. After the first year, the owner finds thick white crust on the posts, slow cranking at the dock, and eventually a no-start call to a tow service. At that point, the batteries and cables look tired enough that replacement feels inevitable.
Now picture the same boat after a power upgrade. The owner switches to a sealed LiFePO4 starting and house setup with rugged cases, installs tinned cables with heat-shrinked lugs, routes wires into a dry compartment, and begins a simple routine: monthly lid-off inspections, quick freshwater wipe-downs after salty trips, and a full clean-neutralize-grease cycle before each season. Terminal protectors and a thin layer of dielectric grease keep metal shielded, and a properly set charger prevents overcooking the pack. A year later, the terminals still look metallic rather than furry, the engine spins confidently, and the owner can focus on fishing instead of fighting chemistry.

FAQ: Coastal Corrosion and Battery Terminals
How often should you service battery terminals in salty air?
In harsh saltwater or heavy road-salt regions, combining quick inspections with periodic deep cleaning aligns well with marine recommendations to check batteries every four to six months and before seasonal storage, as described in marine battery corrosion prevention. For a coastal resident who uses their system regularly, that translates to a fast visual check monthly plus a thorough clean, neutralize, and re-protect routine at least once a season, with extra attention after any obvious saltwater soaking.
Does switching to lithium stop salt spray corrosion on terminals?
Lithium iron phosphate packs sharply reduce acid mist and gas compared with flooded lead-acid batteries, so they lower one major driver of terminal corrosion, a benefit highlighted in LiFePO4 marine battery practices. However, the external terminals, bus bars, and enclosures are still metal in salty, humid air and will corrode if they are left bare, poorly sealed, or made from incompatible metals, as underscored by the focus on connectors and enclosures in salt spray corrosion testing. Treat lithium terminals with the same clean-tighten-protect discipline as any other battery; the chemistry helps, but it does not make hardware immune.
Are dielectric greases really safe on battery terminals?
Dielectric greases are non-conductive, which raises a fair concern, but field experience from marine and workshop users shows that when clamps are properly tightened, the grease is squeezed away from the actual metal contact area and left mainly in gaps where it blocks air and moisture, as discussed in battery terminal corrosion protection. Practical automotive guidance also recommends dielectric grease or terminal protection sprays to reduce future buildup once terminals are clean, explaining that the long-term reduction in corrosion more than offsets the slight initial change in contact, as noted in battery terminal corrosion tips. Used sparingly on assembled, tight connections, dielectric grease is a powerful ally against salt spray.
Coastal environments are brutal on metal, but they do not have to dictate how often you replace batteries or chase intermittent faults. When you combine corrosion-aware design, disciplined cleaning, and smart protection products, you turn every terminal in your system into a hardened connection that delivers reliable power season after season, no matter how salty the air gets.


Leave a comment
This site is protected by hCaptcha and the hCaptcha Privacy Policy and Terms of Service apply.