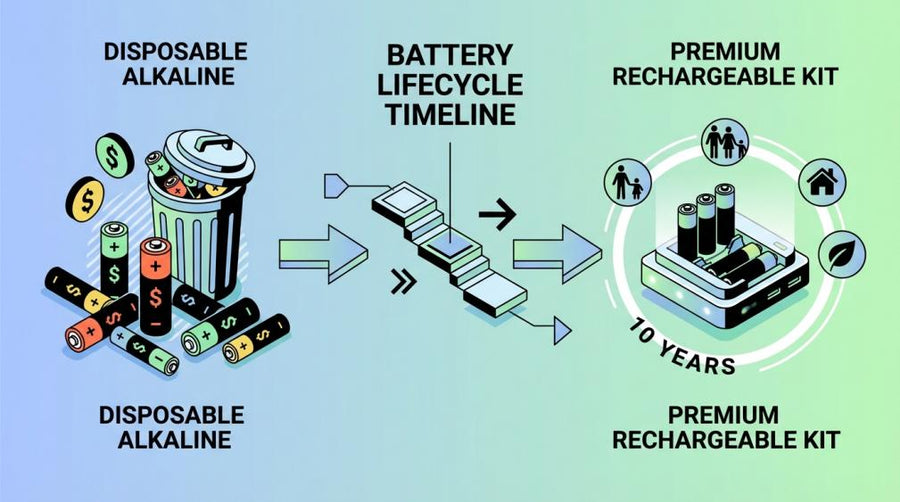
You lock the RV, drive away for the holidays, and a little voice keeps asking, "Will those batteries be dead or damaged by the time I get back?" That worry is justified. Even a parked RV keeps quietly sipping power, and a bad cold snap or cheap charger can ruin a battery bank you spent real money on. With the right monitor and a simple remote setup, you can keep an eye on your batteries from anywhere, catch problems early, and come back to a rig that is truly trip-ready instead of a frozen, sulfated surprise.
Why Holiday Storage Punishes RV Batteries
Even with every light switched off, an RV rarely draws zero power. Safety devices, circuit boards, clocks, USB outlets, and monitors are classic parasitic loads that slowly drag a bank down. Lead-acid batteries naturally self-discharge about 4-15% per month even before you add those hidden consumers. Lithium packs discharge more slowly, but they are not immune, and small phantom loads can push them below a safe voltage if left unattended for weeks.
Understanding the difference between normal self-discharge and a true phantom drain problem helps you diagnose whether your storage losses come from chemistry or hidden electrical loads. The other silent killer is temperature. Lithium RV batteries are particularly sensitive to extremes; manufacturers consistently recommend storing LiFePO4 packs between about 32F and 77F and at a partial charge to reduce stress, rather than full or empty for fall and winter storage. Lead-acid batteries suffer in the opposite way: heat accelerates internal damage, and letting a lead-acid sit discharged makes it far more likely to freeze and crack internally during a cold snap, as detailed in common RV battery maintenance guidance from deep-cycle manufacturers.
Many owners assume plugging into shore power for the entire holiday season is safer than disconnecting. That can be true with a modern multistage converter or smart charger, but older single-stage converters can overcharge and boil off electrolyte if left on continuously, leading to premature failure and even fire risk while the RV is parked. Storage specialists note that long-term plugged-in storage is safest only when you combine a smart charger, good surge protection, and regular inspections. They still recommend unplugging and disconnecting for storage longer than a couple of months to reduce both electrical stress and hazards during extended storage.
Disconnecting or removing batteries for storage is not overkill; it is standard practice among RV service departments.

Battery pros advise using the RV's disconnect switch or physically removing the negative and positive cables to isolate the bank from parasitic loads, then storing removable batteries in a cool, dry, sheltered area instead of leaving them on the tongue or frame as emphasized in RV battery storage recommendations. Self-storage guides echo the same process and stress basic safety: shut everything down, wear gloves and eye protection, remove the negative cable first, and make sure loose cable ends cannot touch metal while the RV sits unattended.
Lithium and lead-acid also want very different storage charge levels. LiFePO4 packs typically prefer to sit at roughly 50-70% charge for longer storage rather than full or empty; that range reduces stress on the cells while still leaving a healthy margin above shutdown for seasonal use. Conventional deep-cycle lead-acid, on the other hand, wants to be stored fully charged and kept there with a suitable maintenance charger, since chronic partial charge is a leading cause of sulfation and failure in RV house batteries.
You can see the pattern: parasitic draw, self-discharge, temperature, and the wrong storage state of charge all stack up. Remote monitoring lets you see those risks turning into real numbers instead of guessing and hoping.
The Data You Must See While You Are Away
A proper battery monitor functions as a dashboard for your power system. Instead of a vague "good/fair/poor" panel light, modern units track voltage, amps in and out, amp-hours used, and percent charge, and many add time-remaining estimates and alarms, which makes managing off-grid RV systems far easier than reading a raw voltmeter as explained in overviews of battery monitoring. Independent testing of RV battery monitors shows that even reasonably priced models can deliver accurate voltage, current, and state-of-charge data across 12-48 V systems while also logging data and warning on low capacity in head-to-head reviews.
The weakest link in most factory RVs is the built-in "battery test" button. Those simple panels look at voltage alone, often while the battery is under load or being charged, which produces misleading results. Owners report seeing "100%" while actually sitting around 80% full, or dropping to "25%" under a temporary heavy load when the bank still has plenty of usable capacity in real-world use on off-grid rigs. Technical guides confirm that voltmeters only give a rough state-of-charge estimate when the system is at rest with no load, and are often unsuitable for lithium where the voltage curve stays very flat over most of the usable range [in explanations of volt- versus shunt-based monitoring].
For lead-acid banks, a useful rule of thumb is to avoid resting voltages dropping much below roughly 12.1 V if you want to protect cycle life. By 12.0 V, a typical 12 V battery is already more than half discharged, and repeating deep discharges drastically shortens its lifespan, as described in RV battery maintenance primers. Because of that, monitoring guides often recommend low-voltage or low-percent alerts set around the halfway mark so you can intervene before hard damage occurs when planning off-grid capacity.
Lithium behaves differently. LiFePO4 can technically be pulled down much deeper without immediate harm, but both storage specialists and long-term off-grid users prefer to keep lithium banks above roughly a third full in everyday use and around half full during storage to maximize long-term health based on seasonal storage recommendations and practical battery-care experience on cruising boats and RVs. Lithium's low self-discharge and lack of sulfation let it sit idle longer, but that advantage is wasted if parasitic loads silently push the pack into its protective shutdown while you are away for the holidays.
A powerful example of why accurate data matters comes from an off-grid day on a 700 Ah bank: a residential fridge, electric heater, microwave, and phone charging added up to roughly 538 Ah of consumption in a single winter day, leaving the bank around 23% full and dangerously low for non-lithium batteries in a real-world monitoring scenario. Add solar and that picture can flip to a safe 80% by evening, but without a monitor tracking every amp, you would never know where you stand.
For unattended storage, voltage and percent are not the whole story. Many modern monitors and hubs add temperature sensors, shore-power status, and even tank or propane data so you can see if a freezing night is about to hit a vulnerable battery or whether campground power has dropped out unexpectedly in descriptions of integrated hubs like Victron Cerbo and specialized RV systems that combine battery and shore-power monitoring with environmental sensors such as RV-focused wireless monitors.
Three Ways to Monitor Your RV Batteries Remotely
Option 1: Bluetooth shunt monitor for nearby storage
Shunt-based monitors are the gold standard for accuracy. They install a precision shunt in the negative line of your battery bank and track all current in and out, then calculate a precise state of charge from amp-hours rather than guessing from voltage in detailed monitoring guides. Popular RV units like the Victron SmartShunt, AiLi 350 A, Renogy 500 A, and Victron BMV-712 all use this approach, adding user-friendly displays and, in many cases, Bluetooth connectivity for phone apps in comparative testing of RV battery monitors.
For a rig stored at home, on your property, or in a nearby barn, Bluetooth is often all you need. Reviewers found that the Victron SmartShunt offers moderate Bluetooth range, while the BMV-712's built-in Bluetooth reliably reached as far as about 100 ft through RV walls and structure, which means you can sit in your house or workshop and still see accurate percent, amps, and time-remaining on your phone in long-range Bluetooth testing. You do not get true "from anywhere" remote access, but you gain the ability to check your bank without walking out to the storage bay in the snow, and the monitor keeps logging data even when you are not connected.
These monitors are also relatively budget-friendly. There are capable options under about $100 with simple displays and shunts, and more advanced models with dual-battery support, temperature sensors, and relays come in around the 200 range in value-focused RV monitor roundups. The trade-off is that they depend on you being physically close enough for Bluetooth, so they are best suited to storage at home, on a friend's property, or at a facility where you can easily park within wireless range of a trusted building.
Option 2: Cloud-connected gateways and "virtual technician" systems
If your RV will sit in a distant storage yard while you fly across the country for the holidays, the next tier is a cloud-connected battery gateway. In this setup, a central hub in your RV (for example a Victron Cerbo or Ekrano GX) ties together your battery monitor, inverter, solar controller, and other gear, then sends live data to an online portal or app in descriptions of all-in-one power command centers. The Ekrano GX, for instance, integrates with the Victron VRM platform, which allows remote access, trend analysis, performance statistics, and custom alerts when voltages or temperatures drift out of your preferred range via its built-in connectivity options.
Some lithium battery vendors now bundle monitoring modules that act like a "virtual battery technician," streaming voltage, percent charge, and health data from your bank to a smartphone app and enabling real-time diagnostics and remote troubleshooting while you are away as described for smartphone-based battery tools.
The upside of these setups is obvious: you can sit at a relative's dining table on Christmas Eve and see exactly what your batteries, shore power, and even propane levels are doing in real time. The downside is complexity and cost. You need a reliable 12 V supply for the hub, some form of internet connection at the RV (Wi-Fi at the storage site or a dedicated hotspot), and time to configure remote access. These systems make the most sense once you have already invested in a larger off-grid system and want detailed visibility into everything from your phone.
Option 3: Camera-on-display for low-cost, privacy-focused monitoring
There is a clever, low-tech alternative that many DIY solar and off-grid users have adopted: aim a small camera at your existing display. In one real system, the owner simply pointed an inexpensive camera at the solar controller and inverter display, then used VPN access to log into a home desktop from a phone, effectively turning the camera feed into a remote window on the system without relying on a third-party cloud service in practical discussions of remote monitoring setups. The same camera also recorded the display and surroundings, which made it possible to scrub back through a few days of footage to see when a fault first appeared.
For an RV, you can mount a small indoor camera aimed at your battery monitor, inverter screen, or even the factory "battery test" panel plus a small digital voltmeter. As long as the camera has power and a network connection, you can log in and read voltage, percent, and warning icons from anywhere. Owners who are comfortable with cloud features can leverage the camera manufacturer's app; those with strict privacy requirements can do what the DIY system above did and use a VPN into a trusted device instead, following similar camera-based remote monitoring patterns.
The main drawbacks are that you only see what is on screen, you do not get neat graphs or downloadable logs, and you must interpret the numbers yourself. Still, for a storage lot that already offers Wi-Fi or for a rig stored on your own property, a simple camera plus a solid shunt-based monitor can be a very cost-effective, low-friction solution.
Holiday-Ready Setup: From Prep to First Remote Check
Prepare the bank and storage spot
Before you even think about apps, make sure the battery itself is ready to sit. Storage guides consistently recommend cleaning terminals with a baking-soda solution, drying the case, inspecting for cracks or bulges, and fully charging lead-acid batteries before storage, topping up flooded cells with distilled water as needed to prevent corrosion and sulfation during downtime. Quality deep-cycle manufacturers add that you should check stored lead-acid batteries about once a month and recharge them before they spend long periods in a low-charge state to avoid freezing and internal damage.
For lithium banks, best practice is different. LiFePO4 packs are usually happiest going into storage around half to two-thirds full and at moderate temperatures. Cold-weather guides recommend disconnecting all loads, labeling the pack with its voltage or date, and then checking every 30-60 days to make sure voltage has not sagged too far below the healthy range in seasonal storage instructions. Because lithium self-discharges slowly, a properly prepared pack with all parasitic loads removed can often sit all winter with only minor top-ups.
If your storage plan involves keeping the RV plugged into shore power to feed both the bank and your monitoring gear, combine that with a smart converter or maintenance charger instead of a basic single-stage unit and treat surge protection and periodic visual inspections as mandatory when deciding whether to leave the RV plugged in. For longer storage where you want to disconnect shore power entirely, consider removing the batteries and storing them indoors in a battery box, then powering any monitoring system from a dedicated, well-maintained battery on the RV that you are prepared to service more frequently.
Install and calibrate the monitor
For shunt-based monitors, the installation pattern is fairly consistent. You power the RV and chargers down, mount the shunt in the main negative line, move all house loads and charging sources to the load side of the shunt, and connect the monitor to battery positive and the shunt sense terminals. Detailed how-to guides stress safety first, then recommend calibrating the monitor when the battery is fully charged so that its "100%" reading matches reality from day one in practical step-by-step installation tutorials.
Once the shunt is in place, you enter your total battery capacity and battery type so the monitor knows what "full" means. From that point on, it will track amps in and out and keep a running tally of amp-hours used, which is how monitors can show both percent and estimated time remaining with reasonable accuracy, as described for battery monitors that act like an energy dashboard and in detailed reviews of shunt-based RV monitors that support advanced configuration.
If you are adding a cloud-connected gateway or virtual technician module, you will also connect the monitor or battery bank to that hub, then tie the hub into your storage-site network via Ethernet, Wi-Fi, or a dedicated hotspot. Before you leave for the holidays, confirm that you can log into the system from a different internet connection and that alerts actually reach your phone or email using the remote access features these hubs are designed to provide.
Set thresholds, alerts, and a check-in routine
With calibration complete, configure simple guardrails rather than trying to watch every tiny fluctuation. For lead-acid banks, set a low-percent or low-voltage alert somewhere around the halfway point. Technical references point out that repeated discharges below that level cut lifespan sharply, and it is much easier to act when an app tells you the bank is drifting toward that danger zone in lead-acid care guidance. For lithium, set your "do something now" alert below the level you consider acceptable, often around a third of usable capacity for general use, while keeping your storage target closer to half full in real-world lithium use and storage examples and seasonal LiFePO4 recommendations from cold-weather storage experts.
If your system supports temperature monitoring, add alerts for both cold and heat. Lithium charging below freezing can permanently damage cells, so it helps to know if the compartment is hovering near that range during a cold snap. Lead-acid batteries lose capacity in the cold and suffer more quickly if left partially discharged at low temperatures in both lead-acid temperature behavior overviews and LiFePO4 winter-storage guidance from RV and boating contexts.
A simple holiday check-in routine is enough once everything is dialed. Many owners find that glancing at their battery app once or twice a week while traveling is plenty: you confirm voltage and percent are staying inside your comfort band, verify that shore power is still present if the RV is plugged in, and skim any alerts the system has logged. If you see a slow downward drift, you can call a friend or the storage facility to top off the bank or disconnect additional loads before you return to a half-dead system.
Comparing Remote Monitoring Options
A quick way to crystallize the choices is to compare them side by side.
Option |
How it works |
Best for |
Key pros |
Main trade-offs |
Bluetooth shunt monitor |
Shunt in battery negative sends data via Bluetooth to a phone app |
RV stored at home, on your property, or in a nearby barn/garage |
High accuracy, good price, strong protection features, simple install |
Limited to Bluetooth range, no internet access without extra gear |
Cloud-connected hub or smart battery module |
Battery monitor feeds a hub that sends data to an online portal/app |
Distant storage with power and network access |
True "anywhere" access, alerts, logging, often integrates solar, inverter, tanks |
Higher cost, needs always-on 12 V and internet, more setup |
Camera-on-display |
Small camera aimed at existing display; you read numbers remotely |
Privacy-focused owners or low-cost retrofits |
Works with existing meters, doubles as security, very flexible |
No direct data logs, depends on camera power/network, more manual interpretation |
FAQ: Holiday Storage and Remote Monitoring
Q: Is leaving my RV plugged in all winter safer if I have remote monitoring? A: Remote monitoring tells you what is happening; it does not fix a bad charger. With a modern multistage converter or smart maintenance charger, good surge protection, and regular checks, leaving the RV plugged in can keep lead-acid batteries topped up and help prevent sulfation during short or moderate storage periods under the right conditions. For storage beyond a couple of months, storage specialists still recommend unplugging shore power and disconnecting or removing batteries so you are not trusting an old converter or campground power for months at a time when planning long-term storage.
Q: Can I rely on the factory "battery test" button instead of installing a monitor? A: For short weekend trips, maybe; for months of unattended storage, no. Those panels only see voltage and are often wildly misleading under load or while charging, as full-time off-grid RVers have found after multiple dead-bank incidents before installing proper monitors on real RV and sailboat systems. Technical references describe them as essentially dressed-up voltmeters, which are inherently limited and often calibrated for lead-acid only, making them a poor fit for lithium banks [in detailed explanations of percentage-style displays].
Q: What if my storage lot has no power or Wi-Fi at all? A: In that case, true "live from anywhere" monitoring is very difficult, because both cloud hubs and cameras need power and a network. The best strategy is usually to remove the batteries and store them at home where you can connect them to a smart maintainer, check voltage monthly, and keep them in a moderate-temperature space as recommended for both lead-acid and lithium storage and major deep-cycle manufacturers. You can still install a shunt-based monitor in the RV for when you are using it or storing at home, but for an unpowered outdoor lot, the priority is robust preparation and periodic in-person checks.
Powering Through the Holidays With Confidence
A parked RV is not a dormant RV; it is a quiet, slow-moving electrical system that will happily destroy expensive batteries if you ignore it long enough. The combination of solid storage prep, an accurate shunt-based monitor, and either Bluetooth, a cloud gateway, or a simple camera gives you control from miles away and turns "I hope it's fine" into "I know it's fine." Set the system up once before the holidays and every future trip away from your rig becomes a whole lot less stressful-and your battery investment lasts longer, performs better, and is ready to roll the moment you are.